 Question posted in

I’m trying to run the following command in my buildspec.yaml (on AWS Codebuild) to insert my React App’s source version into MySQL during the build.
- echo "Saving value to MySQL RDS"
- mysql -h $DB_HOST -u $DB_USER -p $DB_PASSWORD -D $DB_NAME -e "INSERT INTO versionReact (version) VALUES ('$REACT_APP_VERSION');"
When I do so, I get the following error:
/codebuild/output/tmp/script.sh: line 4: mysql: command not found
This intrinsically makes sense, why would the Amazon EC2 box running codebuild have MySQL on it. I found this great SO article that makes life look easy if you’re running Amazon Linux 2, because there’s already an available MySQL package on that runtime.
However, I’m running Amazon Linux 2023 to support Node 18. The details for installing MySQL onto Amazon Linux 2023 appear to be more complex as one needs to retrieve the noarch.rpm file from MySQL community downloads first.
I tried running the following:
- wget https://repo.mysql.com//mysql80-community-release-el9-3.noarch.rpm
- sudo ls
- sudo yum install mysql80-community-release-el9-1.noarch.rpm
I can see the noarch.rpm file in the directory:
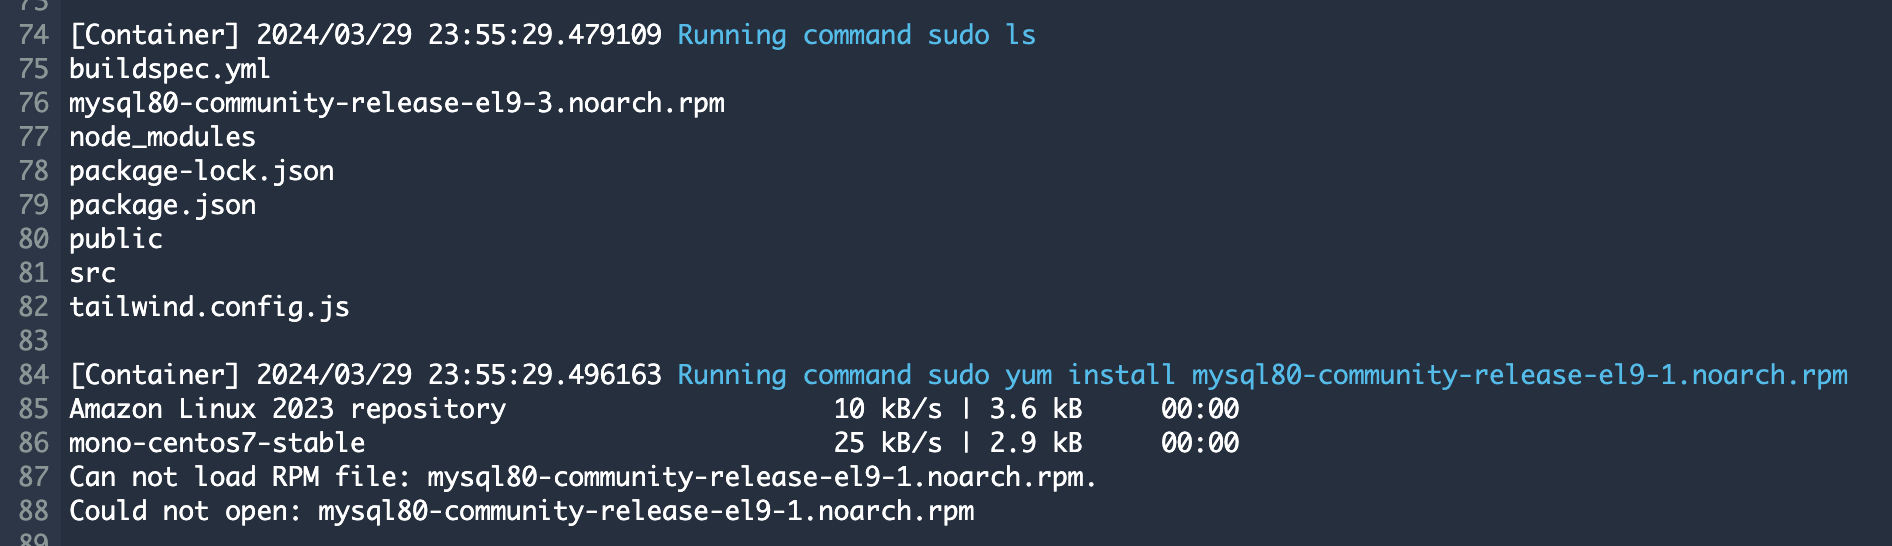
But it fails to run the yum install with "Can not load RPM file: mysql80-community-release-el9-1.noarch.rpm"
Looking for some support on how I might get unstuck (and accomplish my base objective of running that mysql CLI command to insert into my table)?
2
Answers
You can follow this article to install MySQL on Amazon Linux 2023 – https://dev.to/aws-builders/installing-mysql-on-amazon-linux-2023-1512
Let’s troubleshoot the problem step by step:
1. Check File Name and Download Location:
Ensure that the file name you’re trying to install matches the one you’ve downloaded. It seems you’re trying to install mysql80-community-release-el9-1.noarch.rpm, but the file you’ve downloaded is mysql80-community-release-el9-3.noarch.rpm. Make sure the downloaded file matches what you’re trying to install.
2. Correcting the File Name:
In your YAML, the file you’ve downloaded is named mysql80-community-release-el9-3.noarch.rpm, so make sure you use the correct file name in the subsequent commands.
3 .Install MySQL Client:
Modify your YAML to use the correct file name and install MySQL client. Here’s how you can do it:
This script will download the MySQL repository RPM, install it, and then install the MySQL client.
Verify Installation:
After the installation, you can check if the MySQL client is installed by running:
This command should output the version of MySQL client installed.
Execute MySQL Command:
Once the MySQL client is installed, you can proceed to execute your MySQL command in the buildspec.yaml file as you originally intended.
Ensure that the environment variables $DB_HOST, $DB_USER, $DB_PASSWORD, $DB_NAME, and $REACT_APP_VERSION are properly defined in your AWS CodeBuild environment.
With these steps, you should be able to install the MySQL client on your Amazon Linux 2023 environment and execute MySQL commands in your AWS CodeBuild buildspec.yaml file.