


We have been searching for tutorials on how to deploy an Azure Logic App (Consumption Plan) to Azure Cloud using a DevOps pipeline and have even found some posts similar to this question here on Stack, but there doesn’t seem to be a straightforward way to do this.
We originally developed the Logic App directly in Azure Portal are hoping we can download the Logic App from Azure Cloud and modify on a development machine, check into DevOps and deploy back up to the Azure Cloud.
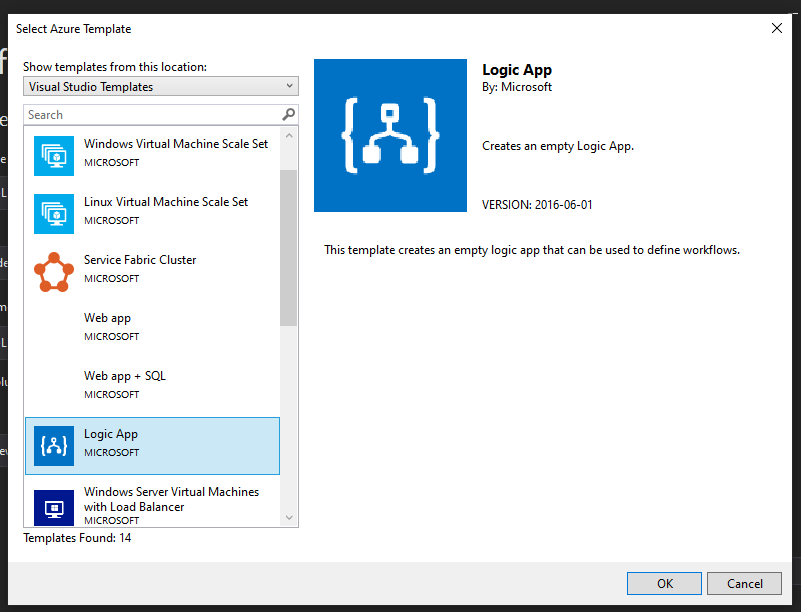
To test this we created a new Azure Resource Group project in Visual Studio 2019 project.
![]()
And chose Logic App:
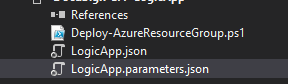
At this point we have a new solution with 3 files
- Deploy-AzureResourceGroup.ps1
- LogicApp.json
- LogicApp.parameters.json
Since we already have developed the Logic App in Azure Cloud, the thought was to download the finished Logic App and add/replace (existing file) to/in this solution however the downloaded file isn’t split into 2 files IE: LogicApp.parameters.json and LogicApp.json and is named something else IE: testLogicApp.json.
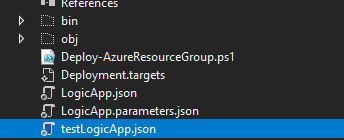
We’re not sure if the downloaded file (testLogicApp.json) needs to modified/renamed and split into a LogicApp.parameters.json file and a LogicApp.json file replacing the existing 2 files.
The next issue we’re facing is how to deploy the Logic App using DevOps.
There seem to be at least 2 options for this which are:
- Use the existing Deploy-AzureResourceGroup.ps1
- Use an ARM Template
But details regarding implementing these 2 possible solutions seem to be difficult to find so we’re wondering if anyone might be able to assist. if they’ve been through this process before.
Thanks in advance.
2
Answers
I usually use this extractor, works great, installation is easy through PS-Gallery
https://github.com/jeffhollan/LogicAppTemplateCreator
you can run:
and to get a separate param file:
Method 1 – Azure Portal
**Note: This is really not specific to Logic Apps and can work with almost ANY Azure resource. You can alternatively use Azure DevOps or Git to do any ARM template deployments to an Azure resource group.You just need your ARM Template JSON file in the Repository and you can set your Parameter override values in the release pipeline.
Method 2 – Azure DevOps
*Note- I am making the assumption you are using Visual Studio to develop your Logic App and Code, which is also integrated with Azure DevOps (or Git).
Make sure your ARM template and parameters file are pushed to Azure DevOps or Git from your local Visual Studio Repo. (So that both files are available in your Remote Repo)
Use these files as an Artifact in your Release Pipeline
The next step is to create your ARM Template Deployment Task and set the file paths from the artifact and fill out the override parameters. This is where you will specify where is the ARM Template deployment deploying to (Subscription, Resource Group, Location, etc) and what parameter values to use: This particular example is using Classic Pipeline editor, but here is the yaml for the task: