skip to Main Content

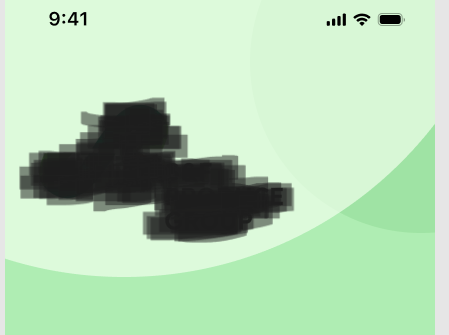
I am completely new to flutter and I’ve a problem that how to include curves in the UI as in the image below if necessary.

sample UI with two curves overriding quater of another

I’ve tried this somewhat (not completed) using the ClipOval widget which is wraped inside the Positioned widget inside a Stack widget. Can anyone tell me is this the correct approach or any other better ones?

Here’s What I tried so far.

import 'package:flutter/material.dart';

class LoginScreen extends StatelessWidget {
  const LoginScreen({super.key});


final backgroundColor = const Color(0xFFAFEDB3);
final ellipse1 = const Color(0xB2F1FFEC);
final ellipse2 = const Color(0xff9FE3A4);


  @override
  Widget build(BuildContext context) {
    return Scaffold(
      appBar: AppBar(
        title: const Text('Login screen'),
      ),
      body: Container(
        // color: const Color.fromARGB(255, 154, 236, 156),
        decoration:  BoxDecoration(
          color: backgroundColor
,
        ),
        child: Stack(
          children: [
            Positioned(
              top: -90,
              left: -75,
              height: 320,
              width: 450,
              child: ClipOval(
                child: Container(
                  width: double.maxFinite,
                  height: 200,
                  color: ellipse1,
                  child: const Text(
                    'Green',
                    style: TextStyle(color: Colors.white, fontSize: 20),
                  ),
                ),
              ),
            ),

            Positioned(
              top: -10,
              right: -25,
              height: 200,
              width: 200,
              child: ClipOval(
                child: Container(
                  width: double.maxFinite,
                  height: 200,
                  color: ellipse2,
                  child: const Text(
                    'Green',
                    style: TextStyle(color: Colors.white, fontSize: 20),
                  ),
                ),
              ),
            ),
          ],
        ),
      ),
    );
  }
}

3

Answers


  1. import 'package:flutter/material.dart';
    
    void main() {
      runApp(MyApp());
    }
    
    class MyApp extends StatelessWidget {
      @override
      Widget build(BuildContext context) {
        return MaterialApp(
          home: Scaffold(
            body: Stack(
              children: [
                Container(
                  height: 200,
                  color: Colors.blue,
                ),
                Positioned(
                  top: 0,
                  left: 0,
                  right: 0,
                  child: CustomPaint(
                    size: Size(MediaQuery.of(context).size.width, 200),
                    painter: CurvePainter(color: Colors.green),
                  ),
                ),
                Positioned(
                  top: 0,
                  left: 0,
                  right: 0,
                  child: CustomPaint(
                    size: Size(MediaQuery.of(context).size.width, 200),
                    painter: CurvePainter(color: Colors.orange),
                  ),
                ),
              ],
            ),
          ),
        );
      }
    }
    
    class CurvePainter extends CustomPainter {
      final Color color;
    
      CurvePainter({required this.color});
    
      @override
      void paint(Canvas canvas, Size size) {
        Paint paint = Paint()
          ..color = color
          ..style = PaintingStyle.fill;
    
        Path path = Path();
        path.moveTo(0, size.height * 0.5);
        path.quadraticBezierTo(
            size.width * 0.25, size.height * 0.25, size.width * 0.5, size.height * 0.5);
        path.quadraticBezierTo(
            size.width * 0.75, size.height * 0.75, size.width, size.height * 0.5);
        path.lineTo(size.width, size.height);
        path.lineTo(0, size.height);
        path.close();
    
        canvas.drawPath(path, paint);
      }
    
      @override
      bool shouldRepaint(CustomPainter oldDelegate) {
        return true;
      }
    }
    

    OutPut

    In this code, I’ve used a Stack widget to overlay two curved shapes on top of each other at the top of the screen. The Positioned widget is used to position the curved shapes at the top of the screen. You can adjust the colors and shapes of the curves according to your design requirements.

    Login or Signup to reply.
  2. usually to achieve this view all answers will use in common a stack and a clipping methodology to create creative clips.

    look at the presentation code: (Stack of Containers).

    import 'package:chat/utils/clippers/MyClipper.dart';
    import 'package:flutter/material.dart';
    
    class HomeScreen extends StatelessWidget {
      static const ROUTE = 'HOME';
      const HomeScreen({super.key});
    
      @override
      Widget build(BuildContext context) {
        return SafeArea(child: Scaffold(
          body: Stack(
            children: [
              Container(
                width: double.infinity,
                height: MediaQuery.of(context).size.height,
                color: Colors.green.shade300,
              ),
              ClipPath(
                clipper: MyClipper(),
                child: Container(
                  width: double.infinity,
                  height: MediaQuery.of(context).size.height,
                  color: Colors.green.shade100,
                ),
              ),
              Positioned(
                right: -100,
                top: MediaQuery.of(context).size.height/3,
                child: Container(
                  width: 300,
                  height: 300,
                  decoration: BoxDecoration(
                     color: Colors.white.withOpacity(.1),
                    shape: BoxShape.circle,
    
                  ),
                ),
    
              )
            ],
          ),
        ));
      }
    }
    

    and the clipper class which clips container, and only applied to the middle container (with color of transparent green).

    import 'package:flutter/cupertino.dart';
    
    class MyClipper extends CustomClipper<Path>{
      @override
      Path getClip(Size size) {
    
        double w = size.width;
        double h = size.height;
        Path path = Path();
        path.lineTo(0, 0.75*h);
        path.quadraticBezierTo(.5*w,.8*h,w,.6*h);
        path.lineTo(w, 0);
        return path;
      }
    
      @override
      bool shouldReclip(covariant CustomClipper<Path> oldClipper) =>false;
    
    }
    

    note: at the first use of clippers, it may be confusing but if you understand correctly how it works, all becomes easy.

    the final result

    enter image description here

    Hope it helps you.

    Login or Signup to reply.
  3. Quick Answer:

    Use CustomPainter to draw custom shapes.

    If you have the image of your curve then try this awesome tool to convert your SVG image to dart custom paint code.

    Detailed Answer:

    To achieve custom shape designs in Flutter, you can use any of the following approaches:

    1. Using image assets directly (SVG or PNG).
    2. Using a combination of ClipPath and Stacks (similar to other answers).
    3. CustomPainter to draw a shape for you.

    Note: Before choosing the methods you should know your requirements, if performance and dynamically changing the shapes’ color, position, or animating the shape is something you want then CustomPainter is the best choice.
    Read this to know why you should choose CustomPainter over the other two approaches.

    enter image description here

    Full conversation: Reddit Thread

    Login or Signup to reply.
Please signup or login to give your own answer.
Back To Top
Search