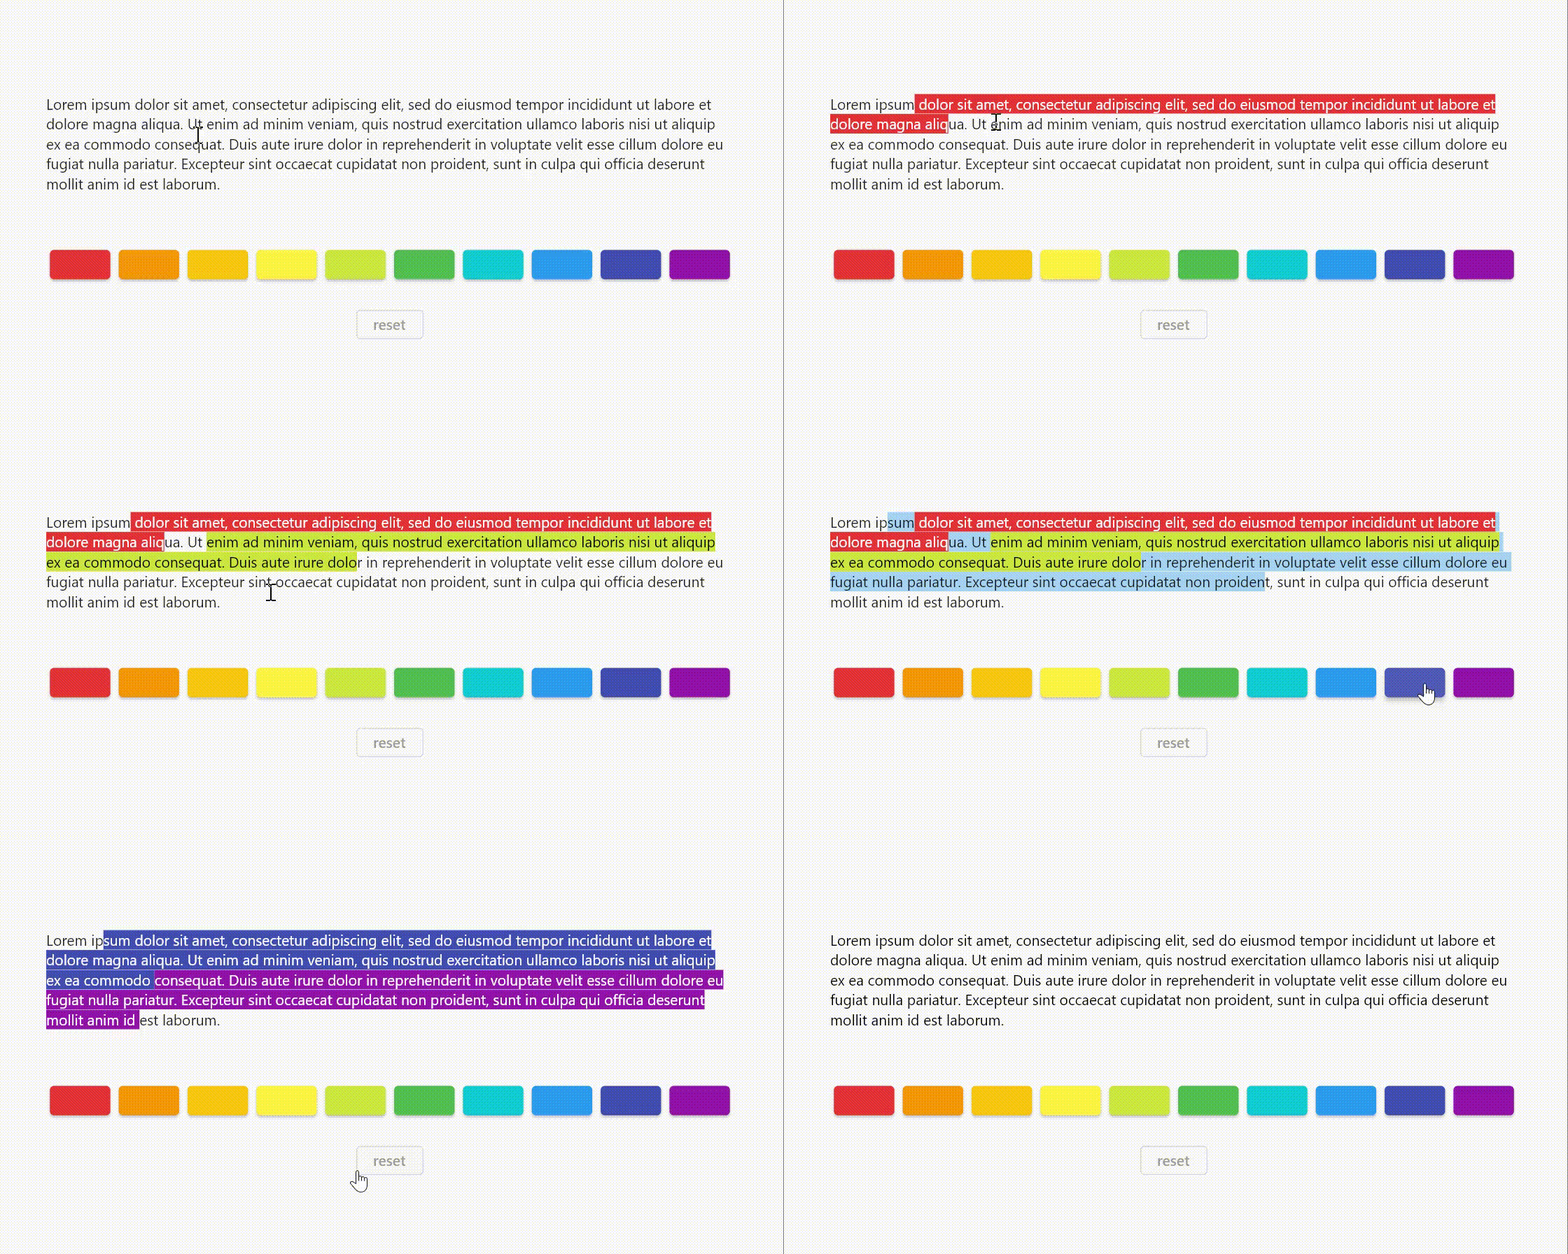
I’d like to create a text field in Flutter where, when I select a portion of the text and press a button, only the selected part changes its color, for example, to red. Moreover, if another section of the text is selected and its color changes, the previous text’s style should be preserved.
My goal is to modify the colors of different portions of text within a text field in Flutter. What steps should I follow to achieve this?
My code is this but it can’t be editable :
import 'dart:math';
import 'package:flutter/material.dart';

void main() => runApp(const MyApp());

class MyApp extends StatelessWidget {
  const MyApp({super.key});
  @override
  Widget build(BuildContext context) => const MaterialApp(home: MyHomePage());
}

class MyHomePage extends StatefulWidget {
  const MyHomePage({super.key});
  @override
  State<MyHomePage> createState() => _MyHomePageState();
}

class _MyHomePageState extends State<MyHomePage> {
  static const _text = 'Lorem ipsum dolor sit amet, '
      'consectetur adipiscing elit, '
      'sed do eiusmod tempor incididunt ut labore et dolore magna aliqua. '
      'Ut enim ad minim veniam, '
      'quis nostrud exercitation ullamco laboris nisi ut aliquip ex ea commodo consequat. '
      'Duis aute irure dolor in reprehenderit '
      'in voluptate velit esse cillum dolore eu fugiat nulla pariatur. '
      'Excepteur sint occaecat cupidatat non proident, '
      'sunt in culpa qui officia deserunt mollit anim id est laborum.';
  final List<TextStyle> _style = List.filled(_text.length, const TextStyle());
  (int startIndex, int endIndex) _selection = (0, 0);

  Widget get highlightedText {
    final List<TextSpan> children = [];
    String currentText = '';
    late TextStyle currentStyle;

    for (int i = 0; i < _text.length; i++) {
      if (currentText.isEmpty) {
        currentText = _text[i];
        currentStyle = _style[i];
      } else {
        currentText += _text[i];
        if (i + 1 == _text.length || _style[i + 1] != currentStyle) {
          children.add(TextSpan(text: currentText, style: currentStyle));
          currentText = '';
        }
      }
    }

    return SelectableText.rich(
      TextSpan(children: children),
      onSelectionChanged: (selection, cause) {
        final (base, extent) = (selection.baseOffset, selection.extentOffset);
        _selection = (min(base, extent), max(base, extent));
      },
    );
  }

  void hilight(Color color) {
    final (start, end) = _selection;
    if (start == end) return;

    final style = TextStyle(
        color: color.computeLuminance() > 0.25 ? Colors.black : Colors.white,
        backgroundColor: color);
    for (int i = start; i < end; i++) {
      setState(() => _style[i] = style);
    }
  }

  late final Widget highlightButtons = Padding(
    padding: const EdgeInsets.only(top: 50, bottom: 25),
    child: Row(children: [
      for (final color in [
        Colors.red,
        Colors.orange,
        Colors.amber,
        Colors.yellow,
        Colors.lime,
        Colors.green,
        Colors.cyan,
        Colors.blue,
        Colors.indigo,
        Colors.purple,
      ])
        _HighlightButton(color: color, onPressed: () => hilight(color))
    ]),
  );

  late final Widget resetButton = OutlinedButton(
    style: OutlinedButton.styleFrom(foregroundColor: Colors.grey),
    onPressed: () {
      _selection = (0, _text.length);
      hilight(const Color(0x00FFFFFF));
    },
    child: const Text('reset'),
  );

  @override
  Widget build(BuildContext context) {
    return Scaffold(
      body: Container(
        margin: EdgeInsets.symmetric(horizontal: MediaQuery.of(context).size.width / 16),
        alignment: Alignment.center,
        child: Column(
          mainAxisSize: MainAxisSize.min,
          children: [
            highlightedText,
            highlightButtons,
            resetButton,
          ],
        ),
      ),
    );
  }
}

class _HighlightButton extends StatelessWidget {
  const _HighlightButton({required this.color, required this.onPressed});
  final Color color;
  final void Function() onPressed;

  @override
  Widget build(BuildContext context) {
    return Expanded(
      child: Padding(
        padding: const EdgeInsets.all(4),
        child: ElevatedButton(
          style: OutlinedButton.styleFrom(backgroundColor: color),
          onPressed: onPressed,
          child: const SizedBox.shrink(),
        ),
      ),
    );
  }
}


2
Answers
This is one interesting case study, and I actually have never done this in Flutter, but I have a few tips on how this can be created.
First of all, remember that you can always break a problem into smaller ones.
The second tip is there is always more than one solution to a problem.
Option 1 – HTML / Markdown
Create your own widget, to display an HTML or Markdown formated String, because any of them support CSS styles and HTML tags.
Then create your own method that grabs the selected color, locates the position of the selected String, and places the HTML tags between the beginning and the end
Example:
Option 2 – using TextStyle
Create a Widget that outputs multiple Text elements with different styles, depending on the background of each element.
If you have text selected, and click on the color, your widget should replace the whole selected section with a Text element with that background color.
Bonus tip
There is some programming code highlighting tools for Flutter, look those up and check how they are doing the color styling.
You can also look up these references.
code_highlight – pub.dev package for code highlighting
How to Make a Multicolored TextField in Flutter – article
Flutter Gallery – demo with code viewer
You might want to use a WYSIWYG editor such as
flutter_quillorhtml_editor_enhanced. These packages have options that allow you to disable certain functionalities to limit your editor, such as removing options that is not related to text highlighting.About customizing available formatting options on
flutter_quill:About modifying enabled toolbar buttons in
html_editor_enhanced: