


I am using visual studio code for Flutter development.
The following code is the main structure of my test application.
import 'package:flutter/material.dart';

void main() {
runApp(const MyApp(
 ));
}

class MyApp extends StatelessWidget {
const MyApp({super.key});
@override
  Widget build(BuildContext context) {
  return MaterialApp( title: 'title', home: const MyHomePage(title: 'a title'),
  );
 }
}

class MyHomePage extends StatefulWidget {
const MyHomePage({super.key, required this.title});
@override
State<MyHomePage> createState() => _MyHomePageState();
}

class _MyHomePageState extends State<MyHomePage> {
@override
Widget build(BuildContext context) {
return Scaffold(
  appBar: AppBar(),
  bottomNavigationBar: BottomNavigationBar(),

  body: Container(
    child: Column(
      children: <Widget>[
        Container(
          const Text('sample text here'),
        ),
        Text(),
        TextFormField(),
        TextField(),
        const SizedBox(),
        TextField(),
        //...
        //...
        //... other components
      ],
     ),
  ),
);
}
}
When I write the codes for adding the components (textfieldboxes, texts, elevated buttons etc.) like shown in the code, it displays each in a row in the same column. But I want to place the components as I wish. For example, buttons side by side.
I am also adding a illustration which I have (bad layout) and what I desire to do (green layout).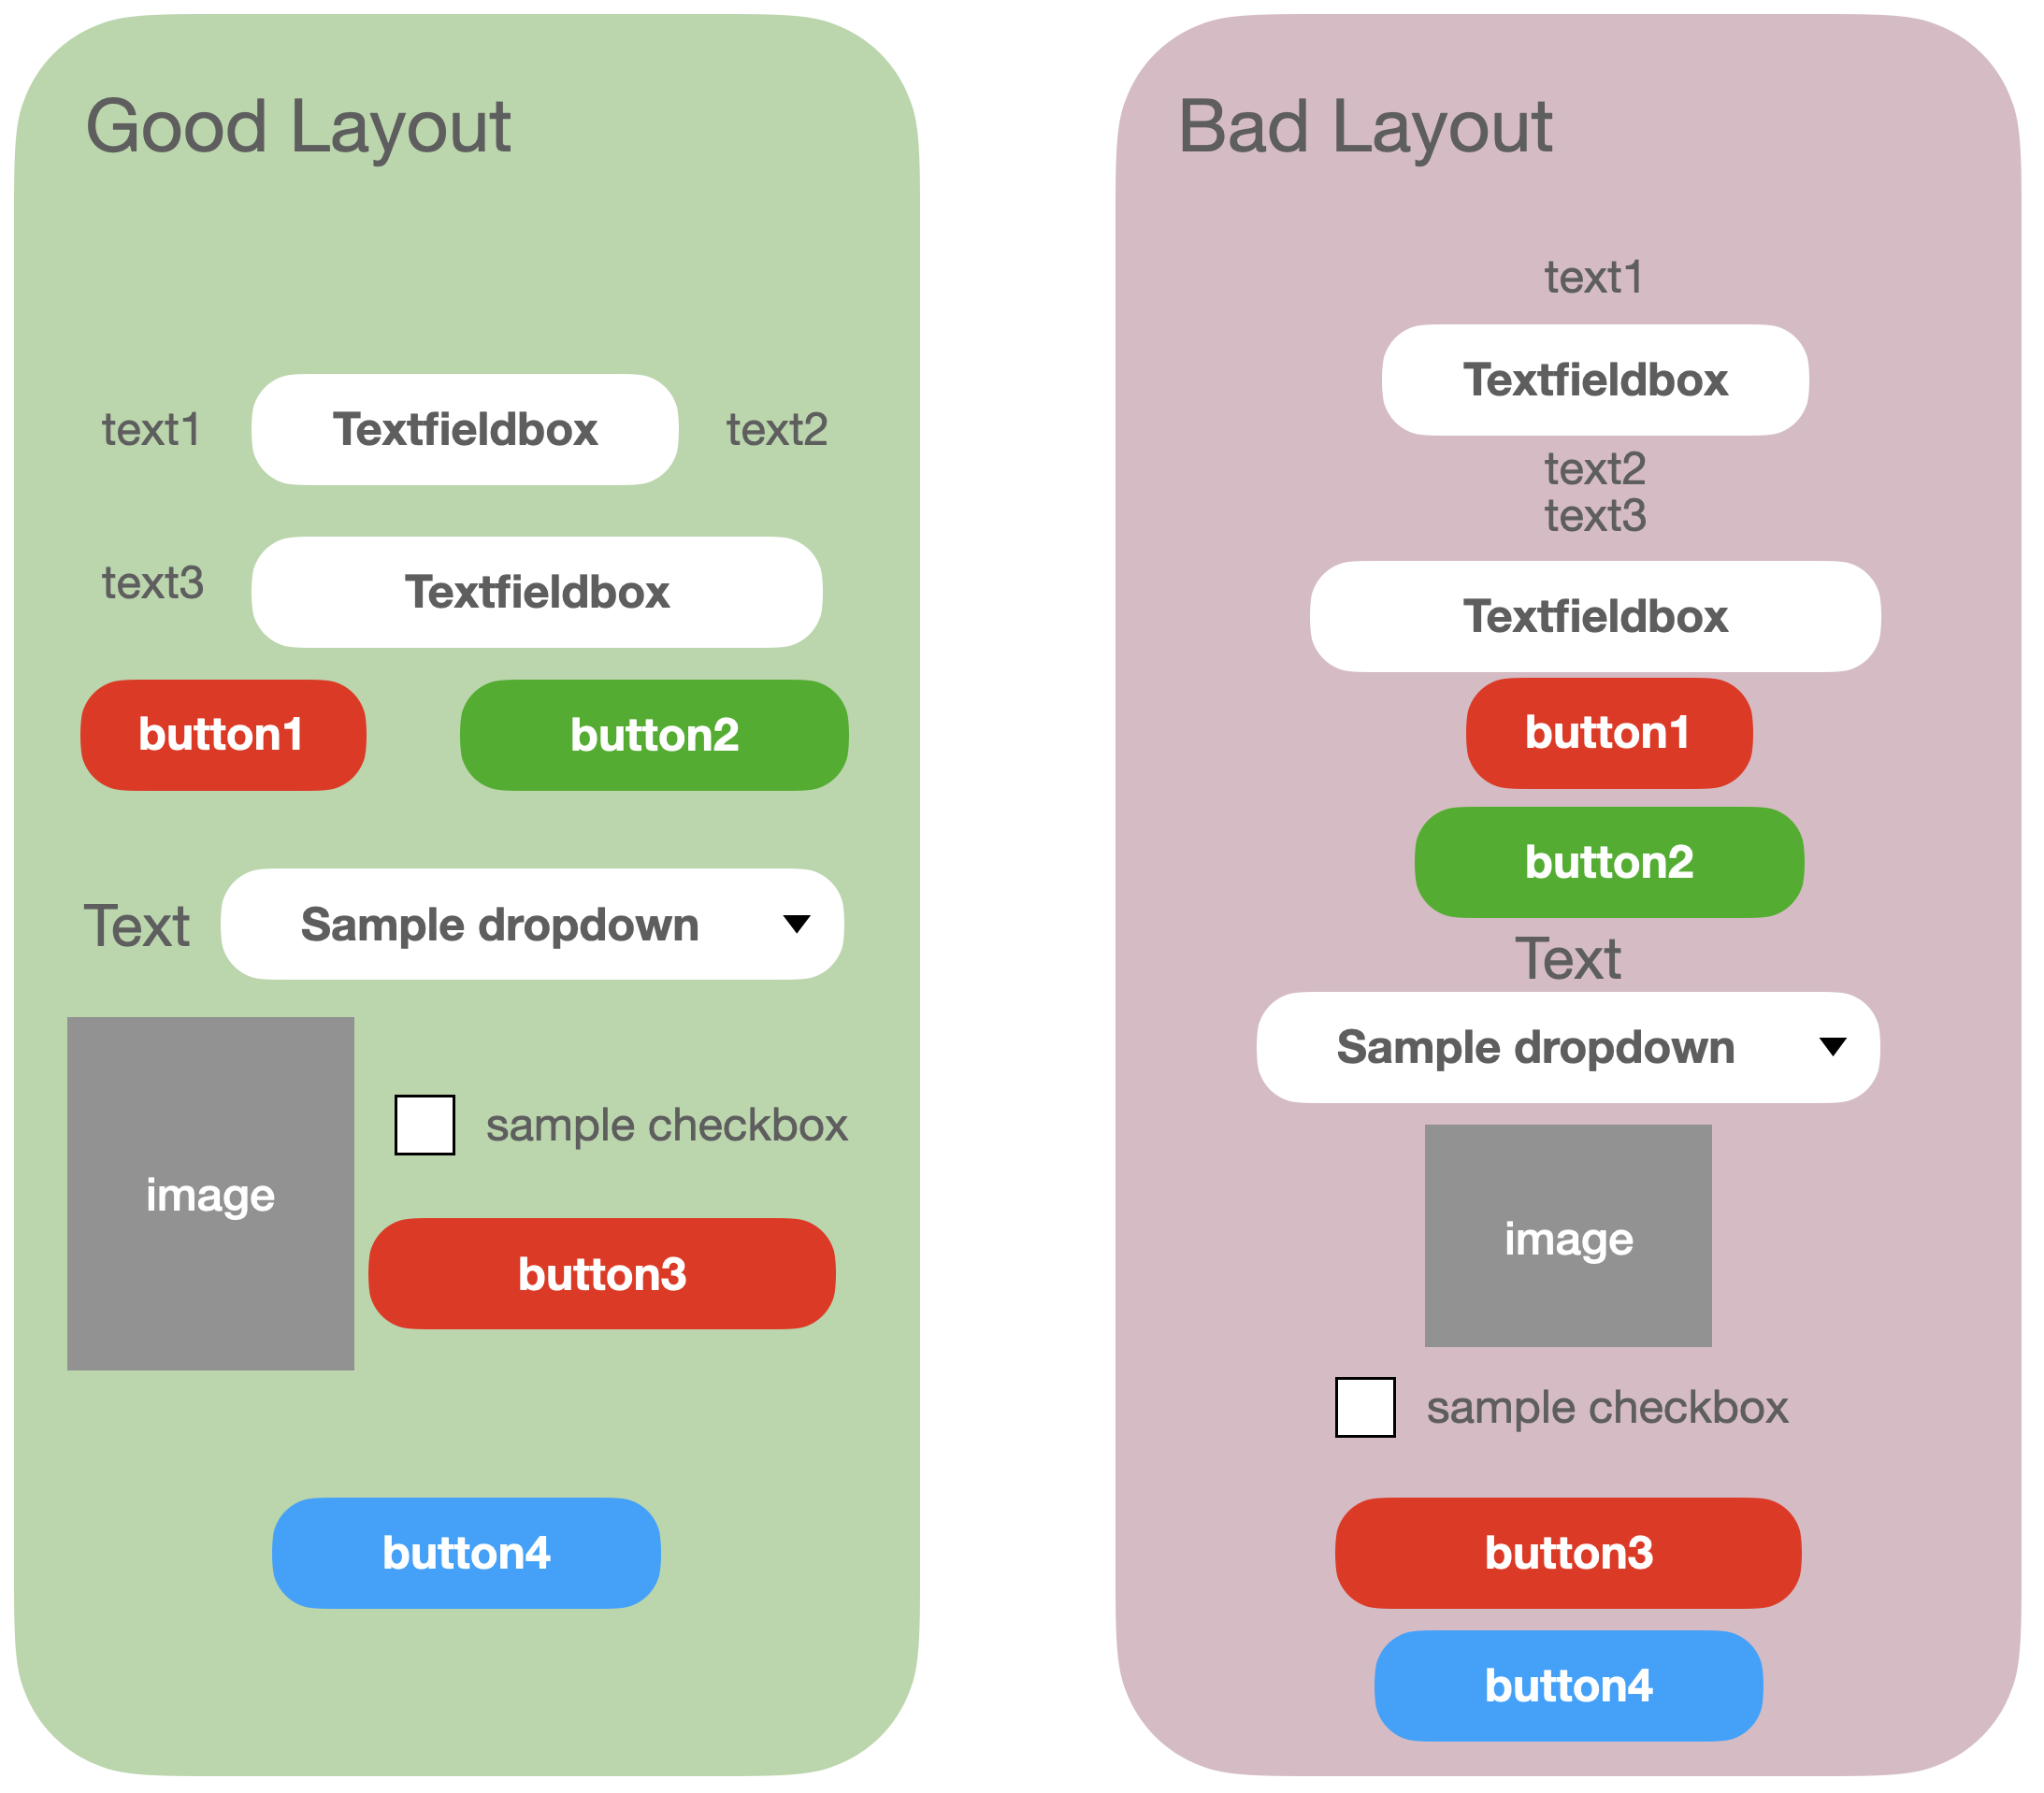
(PS: I know all is about the container, column, row, child, children, …. concept but I don’t know why the copied code is not accepted by the flutter when I sometimes copy the whole code from a working page.)
2
Answers
If you know the concepts, then the first step to place your elements vertically is with a column, which you already have. Second,take for example your widgets text1, textFormField and text 2, the are aligned horizontally inside your column, meaning that they should be inside a row.
Something like this:
Rows and Columns: Row and Column widgets are used to arrange other widgets in horizontal and vertical layouts, respectively.
Row: A Row widget arranges its children in a horizontal line from left to right. You can think of it as a single row in a table.
Column: A Column widget arranges its children in a vertical line from top to bottom. Think of it as a single column in a table.
Nested Rows and Columns: "Nested" simply means placing one row or column widget inside another. This allows you to create more complex layouts by combining horizontal and vertical arrangements.
Nested Rows: You can place a Row widget inside another Row, creating a row of rows. This is useful when you want to divide a horizontal space into multiple sections, and each section may contain its own set of widgets arranged horizontally.
Nested Columns: Similarly, you can place a Column widget inside another Column. This is useful for dividing vertical space into sections, with each section having its vertical arrangement of widgets.
Here’s a simple example
the resulting layout would be like this:
Widget 1 Widget 2
Widget 3 Widget 4
By nesting rows and columns in this way, you can create more complex and flexible layouts to design your Flutter app’s user interface.
Also you can use:
Flexible Widget:
The Flexible widget is used to specify how a child widget should share available space within a Row or Column.
And
Expanded Widget:
The Expanded widget is a shorthand for using Flexible with a flex value of 1. It’s commonly used when you want a child widget to take up all the available space within a Row or Column.