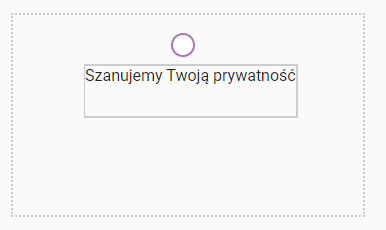
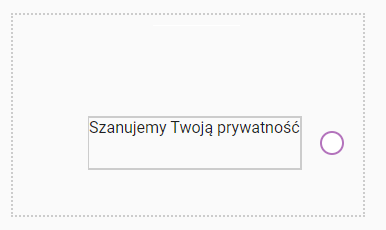
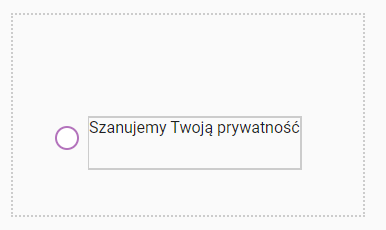
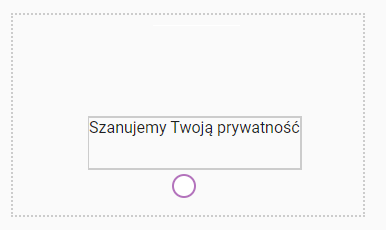
I have an editor in which the user can create a banner the user can drag the element in any position he/she wants inside a banner, the element has a tooltip, on hover, it should show the tooltip positioned on the side where the space is larger than the rest (top, left, bottom, right) and the tooltip should never go outside the container no matter what.
HTML
<div id="banner-container" class="banner-container">
    <span
        (cdkDragReleased)="onCircleButtonDragEnd($event)"
        id="point-button"
        class="point-button"
        cdkDragBoundary=".banner-container"
        cdkDrag
        [style.left]="banner.bannerElements.x"
        [style.top]="banner.bannerElements.y"
        [attr.data-id]="banner.bannerElements.buttonId"
        [id]="'button-' + banner.bannerElements.buttonId"
    ></span>
    <span
        id="tooltip"
        [style.left]="banner.bannerElements.x"
        [style.top]="banner.bannerElements.y"
        [attr.data-id]="banner.bannerElements.tooltipId"
        [id]="'button-' + banner.bannerElements.tooltipId"
    >
        Szanujemy Twoją prywatność
    </span>
</div>
TS
  banner = {
        buttonId: 11,
        tooltipId: 2,
        x: 0,
        y: 0
    };

onCircleButtonDragEnd(event) {
        const container = event.currentTarget as HTMLElement;
        const containerWidth = container.clientWidth;
        const containerHeight = container.clientHeight;

        this.banner.y =
            ((event.clientX - container.getBoundingClientRect().left) /
                containerWidth) *
            100;
        this.banner.y =
            ((event.clientY - container.getBoundingClientRect().top) /
                containerHeight) *
            100;
    }``
CSS
.point-button {
  cursor: pointer;
  display: block;
  width: 24px;
  height: 24px;
  border: 2px solid rgb(179, 115, 188);
  background-color: rgb(255, 255, 255);
  background-image: none;
  border-radius: 100%;
  position: relative;
  z-index: 1;
  box-sizing: border-box;
}

.point-button:active {
  box-shadow: 0 5px 5px -3px rgba(0, 0, 0, 0.2),
    0 8px 10px 1px rgba(0, 0, 0, 0.14), 0 3px 14px 2px rgba(0, 0, 0, 0.12);
}

.banner-container {
  width: 350px;
  height: 200px;
  max-width: 100%;
  border: dotted #ccc 2px;
}
.tooltip {
  width: fit-content;
  height: 50px;
  border: 2px #ccc solid;
  display: none;
}
.point-button:hover + .tooltip {
  display: block;
}`
**
LIVE DEMO
** : DEMO

 Question posted in


2
Answers
Looking at the given demo there is a lot of things to cover:
the
$eventpassed to theonCircleButtonDragEndis not theMouseEventobject; the mouse event can be accessed via$event.eventso when you try to assign theevent.currentTargetto thecontainerconstant, it returns an error,you don’t really need to set
[style.left]and[style.top]of thepoint-buttonbecause theCdkDragdirective already sets the proper position using thetransform: translate3d,you forgot to add the units to the
[style.left]and[style.top]of thetooltipcomponent so even if the values are calculated properly, the styles will not be bound to the element,if you want the
tooltipto float next to the draggablepoint-buttonit’d be best to setposition: relativefor thebanner-containerandposition: absolutefor thetooltip, otherwise they may both be misaligned (as one element influences the position of another),in order to achieve what you want we need 3 things:
I. the size of the
banner-containerin order to compute the position of the tooltip,II. the size of the
tooltipas it influences the desired position,III. the size of the
point-button.We can start solving this by:
getting the mentioned sizes. The most straightforward way to achieve this in Angular is to use the
@ViewChilddecorator to get theElementRefreferences and then get the desired dimensions.adding the
AfterViewInithook in the component in which:I. you save the
tooltipdimensions to use in the future,II. you set the initial
tooltipposition – thepoint-buttonposition is fixed so this should be quite easy (I did it with thesetTimeoutdelayed by0so Angular didn’t complain about the value change during the lifecycles check),III. you hide the tooltip and set it’s
positiontoabsolute. Setting theposition: absoluteordisplay: nonein CSS may result in the wrong dimensions calculation, that’s why I’d recommend to first display it the normal way and then hide. For the purpose of hiding the element in Angular you can just set itshiddenattribute.The next steps are just pure maths. As you presented in the pictures the position of the
tooltipshould be dependent on thepoint-buttonposition. If you analyze it carefully you will notice that one of the possible ways to do this is to divide the rectangle container into 4 triangles using its diagonals and then set thetooltipposition accordingly:That’s why we can tackle this problem by writing the function
computeTheSegmentthat takes the position(x, y)of the point within the container of size(width, height)and then determines to which segment (T,R,BorL) the point belongs. It can be done by writing the diagonals equations explicitly (these are just the linear equations of the formy = ax + b) or by computing the projection coordinates for both the diagonalsd1andd2and then comparing them to the originalxandy.Once we are done we just need to update the
tooltipposition in theonCircleButtonDragEndmethod. We can do this the following way:extract the
circle-buttonposition using the mentionedElementRef,window.getComputedStyleand theWebKitCSSMatrix(to get thexandytranslation from thetransform: translate3dproperty)add half of the
circle-buttonwidth to the extracted position to determine the central point of the button,compute the segment by providing the computed position and the
banner-containersizes to thecomputeTheSegmentmethod,finally, setting the
xandyof the tooltip depending on the segment thecircle-buttonbelongs to:for the top and bottom position set the
xof the tooltip to be thecircle-buttonposition minus half of the tooltip’s width (and accordingly as it comes to the left and right positions and theycoordinate),for the top and bottom position set the
yof the tooltip to be next to thecircle-button(and accordingly as it comes to the vertical segments),remember that we don’t want the
tooltipto overflow from the container, so it’s good to use theMath.max(0, x)function during the computation – if the value is negative it will be replaced by0.I share the demo with you:
DEMO
Of course, it can be done in a more elegant way (e.g. with paying attention to the screen
resizeevent which can influence thebanner-containersize). Nonetheless, I think it’s the fine approach to solve this problem.You can create a function that does the math and logic of determining the
topandleftproperties of the tooltip position. Then you can easily apply them using[ngStyle]:Here’s a working StackBlitz demo.