skip to Main Content

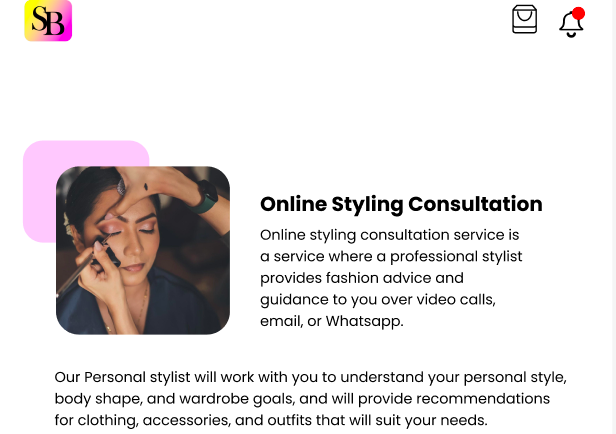
In my app i need to display the text content along with image in UILabel like this enter image description here

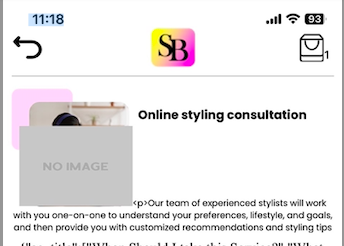
but i am only able to display text along with image like this text string in UILabel is starting from the bottom of the image. But i need to start the text from the top.
enter image description here

I am using the following code please help me to display the image with text in proper format.

let topDesc = responseDict?["description_top"]?.string ?? ""
                    
                    // Create Attachment
                    let imageAttachment = NSTextAttachment()
                    imageAttachment.image = UIImage(named:"no-image")
                    // Set bound to reposition
                    let imageOffsetY: CGFloat = 0
                    imageAttachment.bounds = CGRect(x: 0, y: imageOffsetY, width: 130, height: 92)
                    // Create string with attachment
                    let attachmentString = NSAttributedString(attachment: imageAttachment)
                    // Initialize mutable string
                    let completeText = NSMutableAttributedString(string: "")
                    // Add image to mutable string
                    completeText.append(attachmentString)
                    // Add your text to mutable string
                    let textAfterIcon = NSAttributedString(string: topDesc)
                    completeText.append(textAfterIcon)
                    self.topContentLbl.textAlignment = .center
                    self.topContentLbl.attributedText = completeText

2

Answers


  1. This is an alternative way to do it, declare your objects and set constraints:

    class YourViewController: UIViewController {
    
    let yourImageView: UIImageView = {
        let iv = UIImageView()
        iv.image = UIImage(named: "9")
        iv.contentMode = .scaleAspectFill
        iv.layer.cornerRadius = 10
        iv.translatesAutoresizingMaskIntoConstraints = false
        iv.clipsToBounds = true
        
        return iv
    }()
    
    let bottomLabel: UILabel = {
        let label = UILabel()
        label.text = "Our Personal stylist bla bla bla bla bla bla bla bla bla bla bla bla bla bla bla bla bla bla bla bla bla bla bla bla bla bla bla bla bla bla bla bla bla bla bla bla"
        label.textColor = .black
        label.font = .systemFont(ofSize: 16, weight: .regular)
        label.numberOfLines = 0
        label.translatesAutoresizingMaskIntoConstraints = false
        
        return label
    }()
    
    let rightmLabel: UILabel = {
        let label = UILabel()
        label.textColor = .black
        label.text = "Bla bla bla bla bla bla bla bla bla bla ! bla bla bla bla bla bla bla bla bla bla bla bla bla"
        label.font = .systemFont(ofSize: 15, weight: .regular)
        label.numberOfLines = 0
        label.translatesAutoresizingMaskIntoConstraints = false
        
        return label
    }()
    
    let titleLabel: UILabel = {
        let label = UILabel()
        label.text = "Online Styling Consultation"
        label.textColor = .black
        label.font = .systemFont(ofSize: 16, weight: .bold)
        label.numberOfLines = 0
        label.translatesAutoresizingMaskIntoConstraints = false
    
        return label
    }()
    
    let bgView: UIView = {
        let v = UIView()
        v.backgroundColor = #colorLiteral(red: 0.9690894485, green: 0.8088869452, blue: 0.9875240922, alpha: 1)
        v.layer.cornerRadius = 10
        v.clipsToBounds = true
        v.translatesAutoresizingMaskIntoConstraints = false
        
        return v
    }()
    
    override func viewDidLoad() {
        super.viewDidLoad()
    
        view.backgroundColor = .white
        
        view.addSubview(bgView)
        bgView.topAnchor.constraint(equalTo: view.safeAreaLayoutGuide.topAnchor, constant: 20).isActive = true
        bgView.leadingAnchor.constraint(equalTo: view.safeAreaLayoutGuide.leadingAnchor, constant: 20).isActive = true
        bgView.heightAnchor.constraint(equalToConstant: 90).isActive = true
        bgView.widthAnchor.constraint(equalToConstant: 90).isActive = true
        
        view.addSubview(yourImageView)
        yourImageView.topAnchor.constraint(equalTo: bgView.topAnchor, constant: 20).isActive = true
        yourImageView.leadingAnchor.constraint(equalTo: bgView.leadingAnchor, constant: 20).isActive = true
        yourImageView.heightAnchor.constraint(equalToConstant: 100).isActive = true
        yourImageView.widthAnchor.constraint(equalToConstant: 100).isActive = true
        
        view.addSubview(bottomLabel)
        bottomLabel.topAnchor.constraint(equalTo: yourImageView.bottomAnchor, constant: 5).isActive = true
        bottomLabel.leadingAnchor.constraint(equalTo: yourImageView.leadingAnchor).isActive = true
        bottomLabel.trailingAnchor.constraint(equalTo: view.trailingAnchor, constant: -10).isActive = true
        bottomLabel.heightAnchor.constraint(equalToConstant: 100).isActive = true
        
        // create your right label in a stackView
        let stackView = UIStackView(arrangedSubviews: [titleLabel, rightmLabel])
        stackView.distribution = .fillProportionally
        stackView.axis = .vertical
        stackView.spacing = 2
        stackView.translatesAutoresizingMaskIntoConstraints = false
        
        view.addSubview(stackView)
        stackView.topAnchor.constraint(equalTo: yourImageView.topAnchor, constant: 0).isActive = true
        stackView.leadingAnchor.constraint(equalTo: yourImageView.trailingAnchor, constant: 20).isActive = true
        stackView.trailingAnchor.constraint(equalTo: bottomLabel.trailingAnchor).isActive = true
        stackView.bottomAnchor.constraint(equalTo: yourImageView.bottomAnchor).isActive = true
        
      }
    }
    

    This is the result:

    enter image description here

    Login or Signup to reply.
  2. You can do this by using a UITextView and .exclusionPaths.

    Here, the yellow-background text view is 353-points wide and I define a 116×80 rectangular UIBezierPath:

    textView.textContainer.exclusionPaths = [UIBezierPath(rect: CGRect(x: 0.0, y: 0.0, width: 116.0, height: 80.0))]
    

    enter image description here

    By setting .isScrollEnabled = false on the text view, it will size its own height based on the text.

    Now, all we need to do is add the rounded-rect view and the image view on top of it.

    To get your exact layout – using a single string of text – will be a little difficult.

    As you see in the above image, the text flows around the exclusion path, but the image you posted looks more like this:

    enter image description here

    To get that, I added two line-feeds in the string:

    advice and guidance to you.nnOur Personal stylist will work
    

    However, unless you’re writing the copy to match the available space, it might look like this:

    enter image description here

    or this:

    enter image description here

    If you need the paragraph break as shown in your image, your best option would probably be to embed a special character (or, for example, the double line-break) and split the string at run-time to fill two labels laid out as desired.

    Here’s a quick example showing how to use the .exclusionPaths:

    class ViewController: UIViewController {
        
        override func viewDidLoad() {
            super.viewDidLoad()
            
            view.backgroundColor = .systemBackground
            
            let textView = UITextView()
            
            textView.translatesAutoresizingMaskIntoConstraints = false
            view.addSubview(textView)
            
            let g = view.safeAreaLayoutGuide
            
            NSLayoutConstraint.activate([
                
                textView.topAnchor.constraint(equalTo: g.topAnchor, constant: 20.0),
                textView.leadingAnchor.constraint(equalTo: g.leadingAnchor, constant: 20.0),
                textView.trailingAnchor.constraint(equalTo: g.trailingAnchor, constant: -20.0),
                
            ])
            
            textView.isUserInteractionEnabled = false
            textView.isScrollEnabled = false
            
            let font: UIFont = .systemFont(ofSize: 13.0, weight: .regular)
            
            let paragraphStyle = NSMutableParagraphStyle()
            // let's add a little extra line height
            paragraphStyle.lineSpacing = 2.0
            
            let attributes: [NSAttributedString.Key: Any] = [
                .font: font,
                .foregroundColor: UIColor.blue,
                .paragraphStyle: paragraphStyle
            ]
            
            let str: String = "Online styling consultation service is a service where a professional stylist provides fashion advice and guidance to you over video calls, email, or Whatsapp. Our Personal stylist will work with you to understand your personal style, body shape, and wardrobe goals, and will provide recommendations for clothing, accessories, and outfits that will suit your needs."
    
            let attStr = NSAttributedString(string: str, attributes: attributes)
            
            textView.attributedText = attStr
            
            textView.textContainer.exclusionPaths = [UIBezierPath(rect: CGRect(x: 0.0, y: 0.0, width: 116.0, height: 80.0))]
            
            // so we can see the frames
            textView.backgroundColor = .yellow
            
        }
        
    }
    
    Login or Signup to reply.
Please signup or login to give your own answer.
Back To Top
Search