skip to Main Content

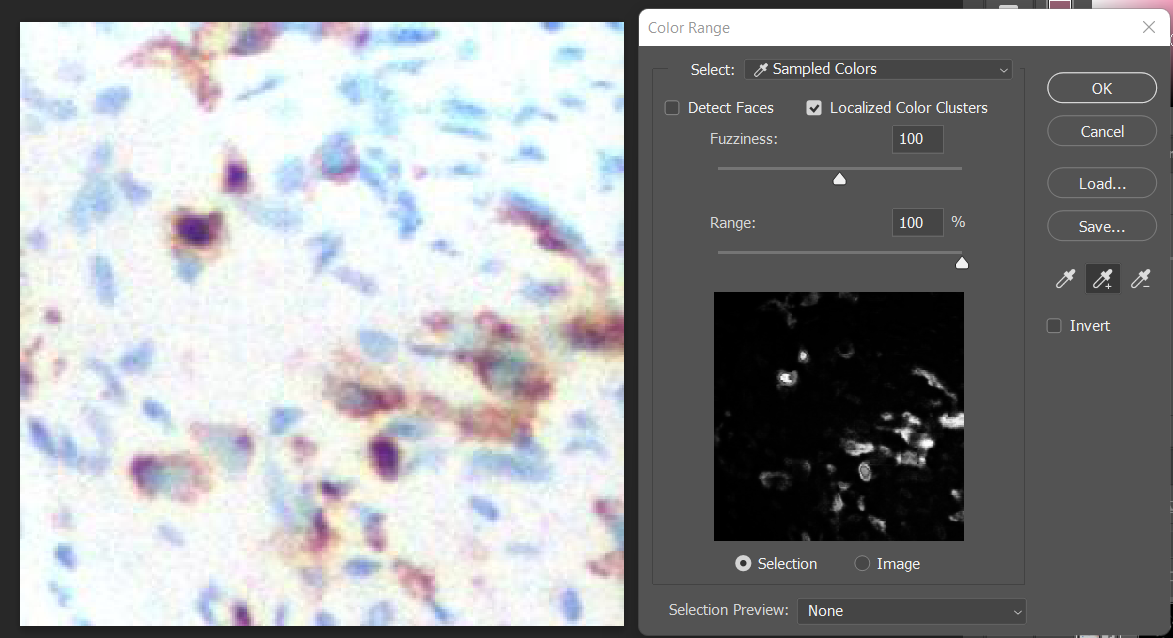
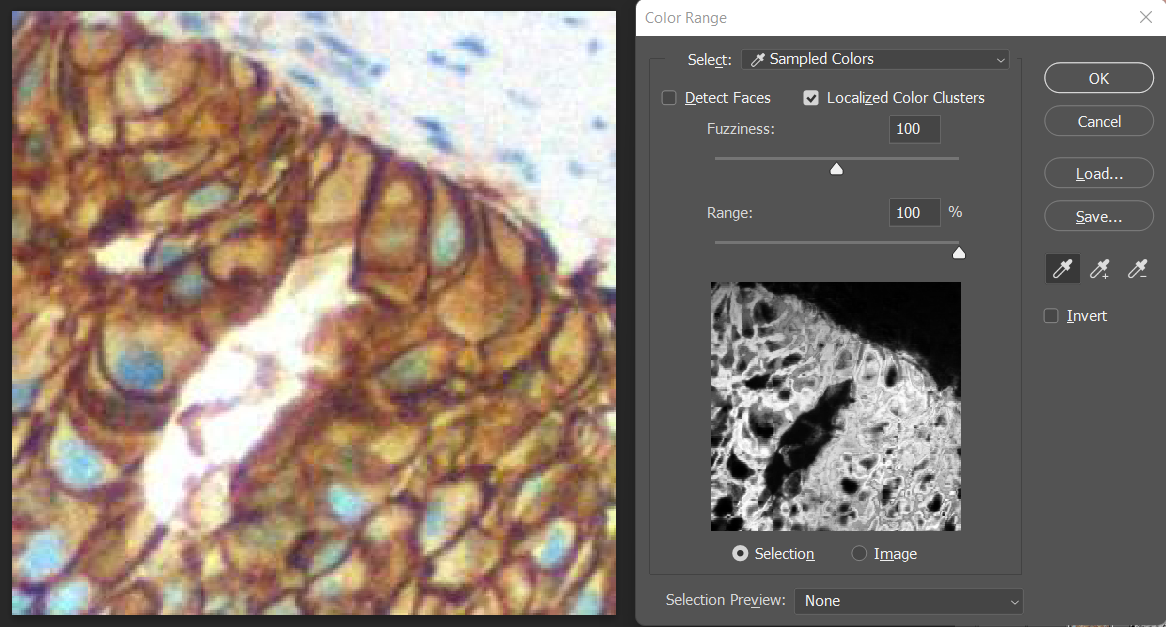
I would like to improve the layer mask that I am creating in Python. Although my mask pretty much hits the targeted color, my main problem with it, is it is doing so in binary, the pixel is either pure white or pure black. I’m unable to extrapolate the intensity of the color. I want to achieve something like how Photoshop does it wherein there are mid-tones of grey on the mask.

enter image description here

Here is the current attempt:
import cv2

image = cv2.imread('grade_0.jpg')

lower = np.array([0,0,0])
upper = np.array([12,255,255])

mask = cv2.inRange(cv2.cvtColor(image, cv2.COLOR_BGR2HSV), lower, upper)  
mask = 255 - mask
# mask = cv2.bitwise_not(mask) #inverting black and white
output = cv2.bitwise_and(image, image, mask = mask)

cv2.imshow("output", output)
cv2.imshow("mask", mask)
cv2.waitKey()

enter image description here

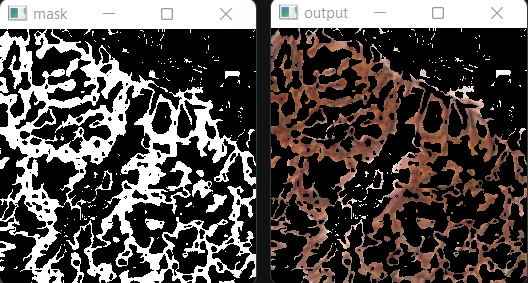
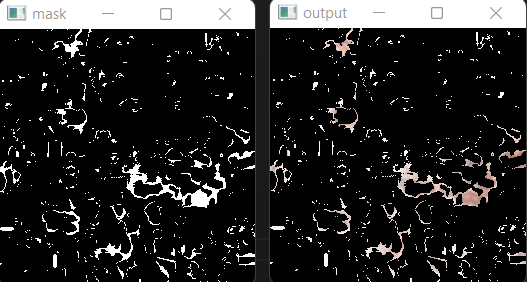
Here are the plain images.

enter image description here

3

Answers


  1. Chosen as BEST ANSWER

    So let me throw in an answer, it might not be a great answer but i did try to somehow go in that direction

    My approach involves creating a mask for every hue value in a given hue range, after that the mask is then combined but with an assigned grey value depending on its position in the input range

    image = cv2.imread('grade_0.jpg')
    
    greyMask = np.zeros(image.shape, dtype=np.uint8) #create an empty numpy image with the same size as the input image, this will be our final mask
    
    lowerHSV = -2
    upperHSV = 20
    
    HSVdifference = upperHSV - lowerHSV
    
    if lowerHSV <= 0 : # account for 0
        HSVdifference = HSVdifference + 1
    
    baseGreyValue = math.floor(255/HSVdifference)
    
    #Create a mask for every hue value in our range and map it into a grey value
    
    greyValue = baseGreyValue
    for i in reversed(range(HSVdifference)): #loop through hue range in reverse order 
    
        if i > 0:
            Hvalue = i
        elif i <= 0:
            Hvalue = 180 - i
    
        mask = cv2.inRange(cv2.cvtColor(image, cv2.COLOR_BGR2HSV), np.array([Hvalue-1, 0, 0]), np.array([Hvalue, 255, 255])) # get all pixels at specific hue 
        indices = np.where(mask==255) #get all the index of pixels
        greyMask[indices[0], indices[1], :] = [greyValue, greyValue, greyValue] #assign grey tone to final mask
        greyValue = greyValue + baseGreyValue
    
    
    cv2.imshow("grey mask", greyMask) 
    
    cv2.waitKey(0)
    cv2.destroyAllWindows()
    

    enter image description here

    enter image description here


  2. I believe applying quantization to your image might achieve the desired effect similar to color range as seen in Adobe Photoshop. Below is the code snippet that I’ve used for posterization, inspired by a solution on Stack Overflow (Adobe Photoshop-style posterization and OpenCV). This approach utilizes quantization to reduce the number of colors, effectively targetting color on the image:

    import numpy as np
    import cv2
    
    gray_scale = True
    im = cv2.imread('6TODV.jpg')
    # im = cv2.imread('2sb5L.jpg')
    n = 4    # Number of levels of quantization
    
    indices = np.arange(0,256)   # List of all colors 
    
    divider = np.linspace(0,255,n+1)[1] # we get a divider
    
    quantiz = np.int0(np.linspace(0,255,n)) # we get quantization colors
    
    color_levels = np.clip(np.int0(indices/divider),0,n-1) # color levels 0,1,2..
    
    palette = quantiz[color_levels] # Creating the palette
    
    im2 = palette[im]  # Applying palette on image
    
    im2 = cv2.convertScaleAbs(im2) # Converting image back to uint8
    if gray_scale:
        im2 = cv2.cvtColor(im2, cv2.COLOR_BGR2GRAY)
    
    cv2.imshow('quantized',im2)
    
    
    # mouse callback function for picking color
    def onClick(event,x,y,flags,param):
        """Called whenever user left clicks"""
        global pos_x, pos_y
        if event == cv2.EVENT_LBUTTONDOWN:
            print(f'click at {x},{y}')
            pos_x, pos_y = x, y
    
    wname = "Original Image"
    cv2.namedWindow(winname=wname)
    cv2.setMouseCallback(wname, onClick)
    
    pos_x, pos_y = 0, 0
    while True:
        draw_im = im.copy()
        draw_im = cv2.circle(draw_im, (pos_x, pos_y), 2, (0, 0, 255), -1)
        cv2.imshow(wname,draw_im)
    
        if gray_scale:
            distances = np.abs(im2[pos_y, pos_x]-im2)
        else:
            distances = np.linalg.norm(im2[pos_y, pos_x]-im2, axis=2)
        distances = cv2.convertScaleAbs(distances)
        cv2.imshow('distances', distances)
    
        mask_threshold = 200 # set this to a value that works for you
        mask = distances < mask_threshold
        masked_im = im.copy()
        masked_im[~mask] = 255
        cv2.imshow('masked', masked_im)
        
        if cv2.waitKey(1) & 0xFF == 27:
            break
    
    cv2.destroyAllWindows()
    

    This method should provide the effect you’re looking for. Here are the results of the image processing applied to the provided picture.

    N = 7

    n=7

    Gray Scale = True, N = 4
    n=4
    n=4

    Login or Signup to reply.
  3. I apologize – my OpenCV is broken at the moment. But here is another method that I will implement in Imagemagick.

    • Read the input
    • Apply a sigmoidal contrast to emphasize the mid range and darken the lows and brighten the highs. (See https://scikit-image.org/docs/stable/api/skimage.exposure.html#skimage.exposure.adjust_sigmoid or just skip this step to have a linear equivalent)
    • Apply a dark only threshold to contrast enhanced image (values below some threshold become black)
    • Then apply a bright only threshold (values above some threshold become white)
    • Then change all white values to black.
    • Then convert to grayscale
    • Save the result

    Input:

    enter image description here

    magick sample.jpg -sigmoidal-contrast 20,50% x.png

    enter image description here

    magick x.png -black-threshold 20% -white-threshold 80% -fill black -opaque white -colorspace gray result.png

    enter image description here

    The sigmoidal-contrast function is:

    ( 1/(1+exp(β*(α-u))) - 1/(1+exp(β*(α)) ) / ( 1/(1+exp(β*(α-1))) - 1/(1+exp(β*α)) )
    

    and has a transfer curve (input to output) shape of:

    enter image description here

    Here is the linear equivalent process, which just skips the sigmoidal contrast. I change the threshold values to compensate some for the lack of the sigmoidal contrast. So it is just a low threshold followed by a high threshold followed by changing white to black, followed by convert to grayscale.

    magick sample.jpg -black-threshold 30% -white-threshold 70% -fill black -opaque white -colorspace gray result2.png
    

    enter image description here

    Login or Signup to reply.
Please signup or login to give your own answer.
Back To Top
Search